Telltale’s move to PBS : shifting technologies and practices.
While I was at Telltale, we had an internal agenda to upgrade the ‘fidelity’ of our projects moving forward (starting with Batman) so as our games would not be perceived as ‘outdated’. On paper this sounds like a simple initiative, but it was no small feat as Telltale has very compact development schedules, which make such transitions sensitive and difficult to achieve cleanly. Coupled with the deadlines, teams needed to work with the approach of “author once, run anywhere” in terms of multi-platform development. This essentially meant that content creation was to be done once and the engine would handle deployment to all platforms, which at this point in time stretched from mobile platforms to current generation consoles (Xbox One / PlayStation 4).
The majority of art on Telltale projects were heavily reliant on hand painted maps with lighting heavily painted in. Most environment assets had no normal maps, and most characters had painted lighting since most of the time the light rigs used for characters did not have specular (only a few lights per scene would support per pixel specular depending on the platform). Most environmental lighting was baked in via Maya and mental ray. If you’re reading this and familiar with the process – it is likely you were involved with game development in the late PS2 / early 360 era where lightmaps were starting to be baked to textures (a massive improvement over slicing geometry and baking to vertices).
Since Telltale’s projects were so stylized, and because the overheard on this old school lighting technique was so low, the end result was effective and played well to the aesthetic of each project. The entire pipeline Telltale had setup was built around this concept, from internal Maya tools to a proprietary engine that showed artists what they could expect on platforms (and there were quite a few platforms that games shipped to).
Workflows were also adapted around this – artists in particular were encouraged to re-use texture maps and apply materials without re-work to help increase their speed to match deadlines for episodes. This worked very well, and Telltale’s projects with an absurd amount of new content were released at speeds unmatched by other studios.
However, the style did start to show its age, especially with the turn of current generation consoles and other projects showcasing better shading / lighting were not helping in showing the ‘age’ of Telltale’s games. Decisions were made and it was decided that Batman would be the start of a new push towards improved visual fidelity. Right before the initial shift with Batman, the engine had been updated in the background to support DX11 for Walking Dead: Michonne, but was still using the same shading model that had been set for quite a while – a lambertian diffuse model with blinn-phong as specular (where applicable for characters).
If you looked closely at Michonne’s water and some of the foliage in the first scene, you’d would be seeing the first use of the material system – a flow map was created and used for the water, which was a prominent theme in the game and there was some subtle animation for the foliage to simulate wind.

While only a few days in, the system proved to be fairly powerful, and it’s ability to generate compiled shaders for use in Maya’s DirectX11 plugin was immensely useful as artists would be able to preview their assets without exporting to the game engine, allowing them to quickly setup more complex materials – such as texture and material blending.

The start of a very fast and rocky trip.
If you’ve attended GDC – you’d have noticed a few years where a lot of studios began talking about their transitions to a physically based model. And it indeed is a transition – artists can not be expected to turn on a dime and change their way of thinking.
Unfortunately, the timeframe for releasing Batman was not the typical 2-3 years other studios have, it was instead a shortened several months (with an E3 demo preceding release). Over the course of a few months the engine’s renderer was overhauled with new graphical features:
- volumetric fog support
- an entirely new diffuse model that supported advanced cell banding and color blending
- more advanced mesh outlines
- adoption of a phsyically based specular model (GGX)
- entirely overhauled lighting
- improved postprocessing.
With such a rapid turnaround time and implementation, there was not much time for the art department to change their processes. This ended up in less than ideal optimization for their scenes and characters that led to performance issues on initial release. While rectified fairly quickly (in several weeks), it’s impact was noticed and amplifies one of the issues of such a fairly compact release timeframe.
The DCC Funnel
If you’ve worked with a traditional game pipeline, there is typically a very fixed DCC path. Art is created in Maya or 3ds Max. There are a lot of scripts and a proprietary format is involved while the entire process is bottlenecked through what is essentially an export button that spits out art in a format with metadata the engine can read and process. This is similarly true for commercial engines such as Unreal or Unity, although they adopted more available formats such as FBX (Unreal used to look for .ase, .asm and .asx before FBX took over) which allows a wider range of DCC programs to be used.
Telltale relies heavily on their use of Maya for asset creation, scene setup and import. This means a lot of data is handled inside of Maya, and was therefore useful to aggregate data. Tools were easy to setup to help with setting up materials and exporting, but also ended up a double edged sword as the heavier the toolset became the slower Maya would be. Limitations from Maya also came in as a surprise in the least expected places. The studio’s reliance on Mental Ray, for instance, was an issue early in production as Mental Ray does not recognize DirectX 11 shaders and would treat them as default grey lamberts. The resulting lightmaps generated would be devoid of color bounce, which was used to great effect by the environment art team in previous projects. While a proprietary light baking system, and later on Enlighten, was introduced – it provided a headache to the art team who had to deal without while said systems were being developed.
Adopting GGX / PBS took more time than anticipated
A major miscalculation was the assumption people would take to a new specular model easily. Infact, most of the art assets previously had not been created with any specular in mind – all lighting was baked onto a large chunk of assets. Characters had dynamic lights (at the time, upto 4 per) but specularity was rarely used and art often opted to paint highlights in heavily. Some artists took a longer time to grasp that a matte surface still receives specularity, just more spread out – giving the appearance of their diffuse being ‘washed’ out.
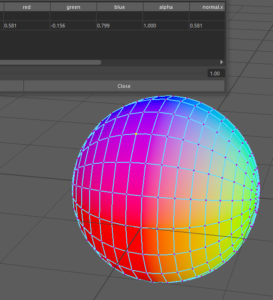
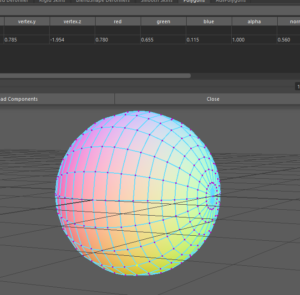
One important tool to help art direction understand the longer ‘tail’ that GGX has was Disney’s BRDF viewer, which provided a slider and ability to compare BRDFs. A custom gif was created as well that showed gloss transitioning from 0.0001 to 0.99, which went a long way of showing the curve it respects.
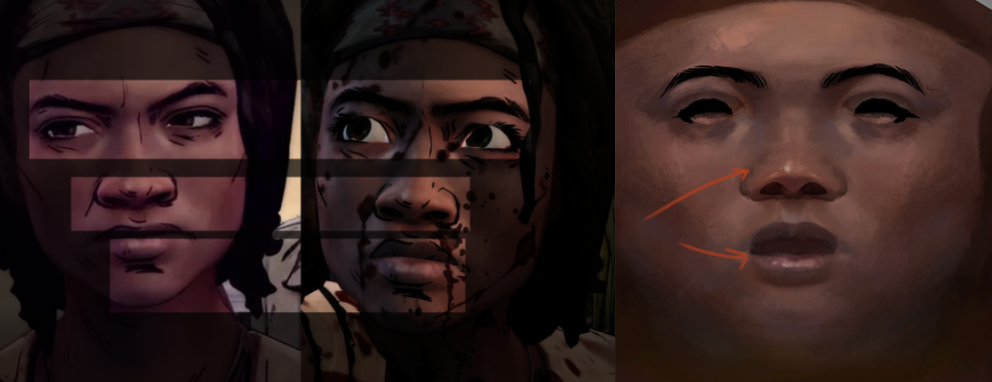
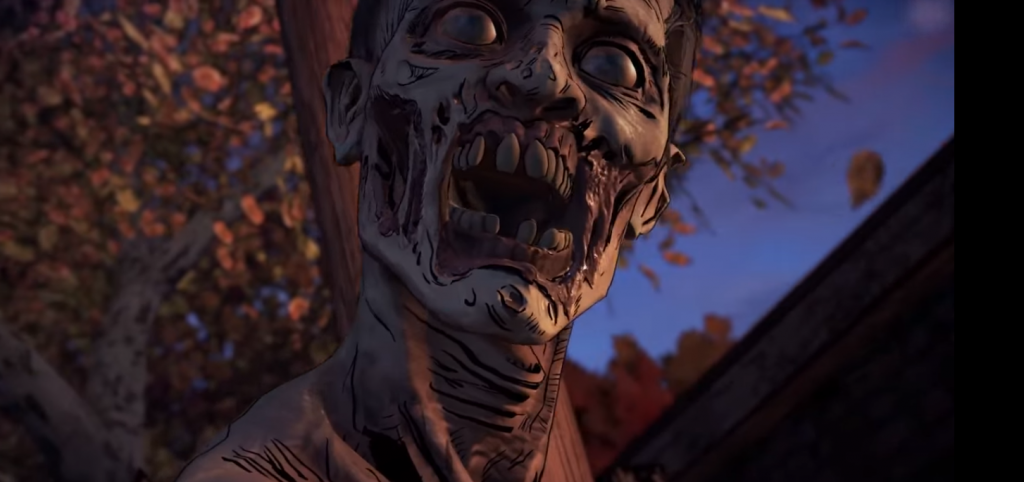
Physically based shading was also a hot topic for a while, and led to some interesting results. While we ended up sorting most issues through the heavy reliance on Substance Painter / Designer, some initial results ended up in poor results that were blamed on the shading being incorrect, or ‘bugs’. The initial teaser for Walking Dead 3 showcased a zombie with very muted specular, as the artists had a bright blue specular map being used, instead of a more physically correct specular value (closer to 0.02) for non-dielectrics. The end result was a quick hack that muted and dulled all specular output for this character, and ended up looking fairly flat.
Automation and tools saved the day.
I worked on three major scripts / tools during my time at Telltale, all were built to support various stages of production and to address critical issues facing the studio and projects.
While Batman had a set of assets built to support the newer BRDFs from the getgo, Walking Dead 3 had a much longer tail, and had started production earlier – with the assumption that they would initially be using the older materials and shading models the studio had used before. This meant that a few days before the vertical slice was due, most assets had only a diffuse map painted before the decision to use GGX for the specular BRDF was made.
How would the art team (at this point fairly small) manage to re-do their assets in a few days?
The short answer was they didn’t.
Thanks to the way the diffuse painting and guidelines were setup, it was fairly trivial to separate out materials and generate color ID maps from the diffuse PSDs.
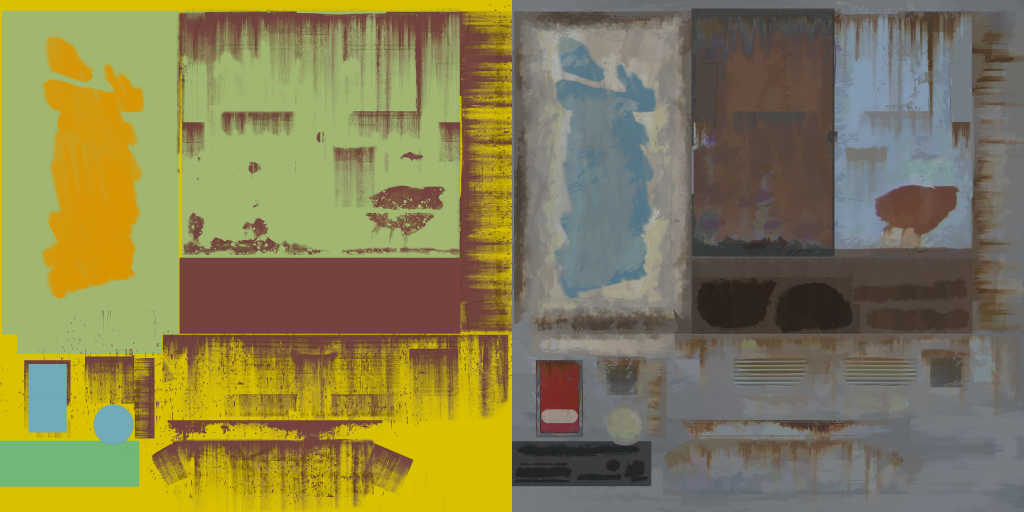
From there, if the naming was setup correctly, artists would simply launch a python tool that utilized Substance’s Batch Tools, generate physically correct specular and gloss maps, along with auto-correcting the albedo maps (especially if the material was metallic), and then auto-assign correct shaders with the maps plugged in and ready for export. Below we can see the very first assets I used to generate these maps while testing the Substance Designer graph and tool I wrote:
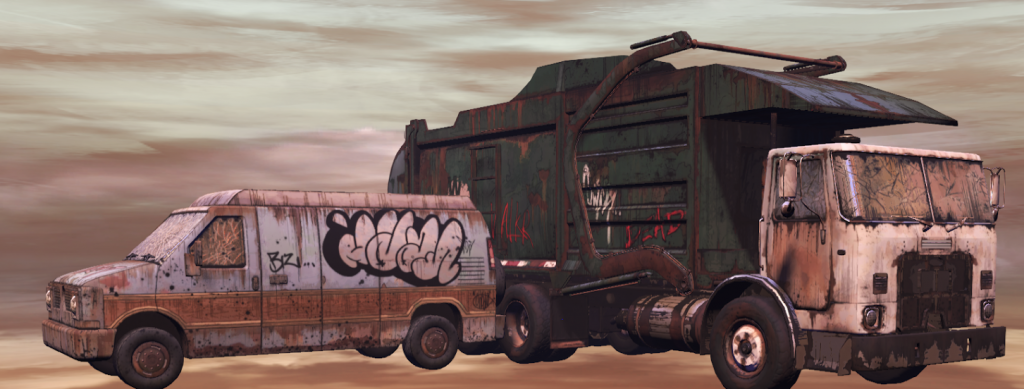

While the script took a weekend to write and test, it ended up creating a vertical slice so successful, it was used as the showcase trailer for Walking Dead Season 3, and the tool saw use for the rest of the project and as a way to have outsourcing generate correct gloss/specular maps with little oversight. To view this trailer, you can visit https://www.youtube.com/watch?v=m3M5mlkvk9w
The script was also adjusted to support multiple projects, such as the in-progress Batman and the upcoming Guardians of the Galaxy – although by that time the art team had adjusted well to the physically based shading model and relied more heavily on Substance Designer / Painter for their assets.
def substanceRender(self,diffuse,currentProject):

		location = locations()
		sbsRender = location.substanceDirectory()[2]

		if currentProject == str(location.wd3Project()):
			sbsInput = (location.substanceDirectory()[4] + "graphSpecGloss.sbsar")
		else:
			sbsInput = (location.substanceDirectory()[4] + "batman-graphSpecGloss.sbsar")

		inputDiffuse =  currentProject + diffuse

		inputMask = inputDiffuse[:-4] + "_mask.tga"


		sbsRenderArg = ('render '+
               '--inputs "{0}" '.format(sbsInput) +
               '--set-entry input_diffuse@{0} '.format(inputDiffuse) +
               '--set-entry input_mask@{0} '.format(inputMask) +

               '--input-graph-output {0} '.format('diffuse') + #specify which outputs to process
               '--input-graph-output {0} '.format('spec') +

               '--output-format "{0}" '.format('tga') +
               '--output-path {0} '.format(currentProject) +

               '--output-name {0}'.format(inputDiffuse[:-4]) + '_{outputNodeName}' #fileouput
               )

		return sbsRender,sbsRenderArg #for debugging purposes
Prior to Batman, there was no concept of memory auditing, or any process that took place. Any process that took place was done at the end of production during build time – often resulting in last minute texture size reduction done by a member of the build team. While the rendering technology had leaped forward an immense amount during a short period of time, the production methodologies had not. This was compounded with the lack of tools or processes to help adapt art production to new tech. Imagine not know how ‘large’ an environment was in terms of memory, or even a character. In the past, the art department was told to do make things look good under a short amount of time – which sometimes meant cobbling together textures from various projects and other sources – and slapping a new material onto a single mesh.
Some assets in older projects may have had upwards of 5 materials or more on them. This didn’t matter much as there was no lighting on these assets. Everything was baked on with lightmaps. With the shift to a new more physical model and renderer, doing so added much more complexity and required a tighter control of art assets. It was simply not good practice to have multiple materials on meshes, and the addition of a specular albedo / gloss and normal texture would result in triple the memory costs. Needless to say, running out of memory was often an issue with Batman and Walking Dead due to lack of visibility and insight of how large scenes were.
The tipping point came in near the end of Batman’s launch, where we needed to have a good view on what our material settings were. Thanks to the nature of Maya and its DirectX 11 plugin, it was possible to query a Maya scene, every material setting and texture input possible. Since Telltale relies heavily on Google Apps for their mail and documents, it also made sense to also use Google sheets as a way to store this information. Thankfully, Google provides a Python API to access their online app suite, and after a few weeks of late nights, I ended up writing a set of scripts that would do the following on a nightly schedule:
- Connect to Google Sheets, and read through various sheets containing a list of characters, environments and objects being used in any one production
- Launch Maya in offline mode, connect to source control and download those assets
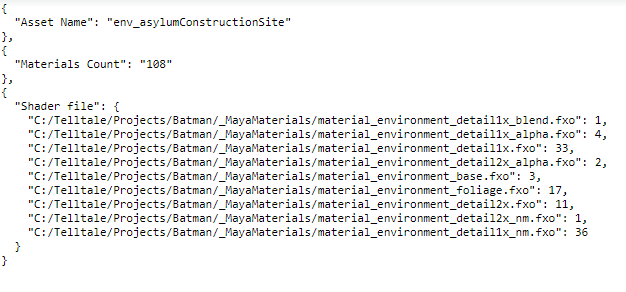
- Open the file and pull a large amount of information about assets:
- Unique texture count per scene, Texture dimensions, sizes, channels, triangle counts per asset, total triangle counts per scene, materials per object, total material instances and unique shaders being used
- Generate a new set of spreadsheets with that information collated in a more readable fashion
- Email out a log once done
With this information we were able to move forward with Walking Dead and identify where we were using up our memory. With a budget of roughly 1.2gb per scene we found we were blowing out memory due to the size of our environments in many cases. Unfortunately, by the time this information had been collected, we were close to shipping Episode 1 of Walking Dead, and few resources were available to re-do assets.
This is where Simplygon came to play. In previous projects, Simplygon was relied on to reduce vertex counts for characters on lower end platforms (Wii, mobile) but not much else. Simplygon provides lincensees the ability to use a plugin built for Maya – where I ended up writing a tool that would allow artists to ‘one-click’ reduce assets in a pragmatic fashion – select a number of assets, choose a new name for the final reduced mesh (and material), and a final resolution. With the help of Simplygon’s plugin and some Python/MEL we would be able to have a smaller asset with a reduced single material, and a single set of normal, spec albedo/gloss and albedo textures.
The result was clear: a near half reduction in total memory costs for some scenes without much loss in quality. Scenes that were crashing the Xbox One were now performant.
This diagnostics tool also allowed the start of memory budgeting – something the studio had not done in the past. The budget changed per title, but allowed a good chunk of memory for environments, and then for characters, followed by UI then VFX last. In some projects, characters gained a larger share of memory over environments, but the end sum allowed scenes to be set up while falling under the set budget. During scene planning meetings, production could pull up the sheets to determine if a planned scene allowed for a feasible amount number of character variety.